Adding a Disk Drive to an Array
Adding a Disk Drive to an Array
This option allows you to install a replacement disk drive into an array that is running in the Exposed or Degraded state,
because you have removed a disk drive. When you install the replacement disk drive, all the data that was contained on the original
disk drive is automatically written to the replacement disk drive.
- Physically install the disk drive (see the unit Hardware Maint. Manual).
- Start the SSA Configurator and Service Aids utility (see 'Starting the SSA Configurator Functions')
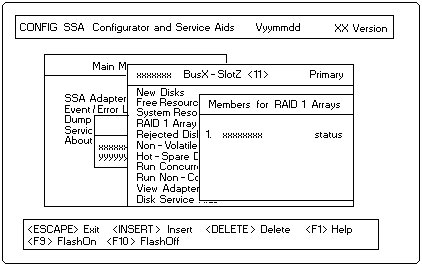
- From the Main menu, select SSA Adapter List
The SSA Adapter List Window opens.
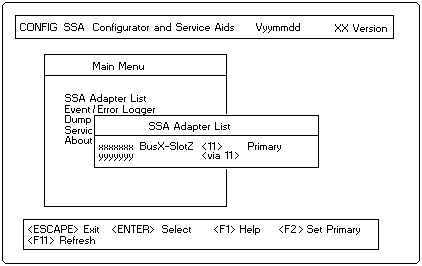
- Select the required adapter from the SSA Adapter List.
- The Adapter Menu window opens:
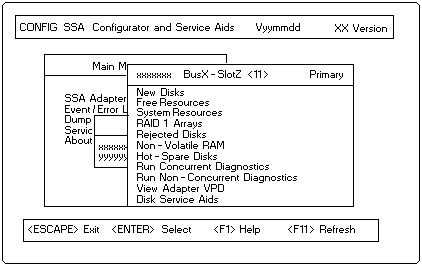
- Select System Resources from the Adapter menu.
A list of system resources is displayed:
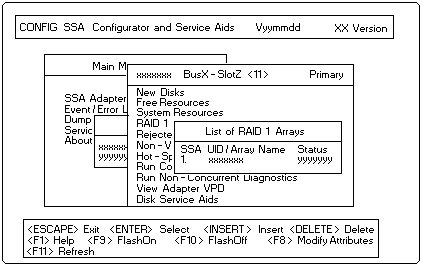
- Select the array to which you want to add a disk drive.
The View RAID 1 Arrays window is displayed:
- Select View Members from the RAID 1 Arrays window.
A list of member disk drives is displayed:
- Select Not Present (Blank Slot).
- Press F7 (Exchange Members). A list of candidate disk drives is displayed.
- Select the disk drive that you want to add to the array.
- Press Enter. The selected disk drive is added to the array.
Back to 
Please see the LEGAL - Trademark notice.
Feel free - send a  for any BUG on this page found - Thank you.